Video On-Demand
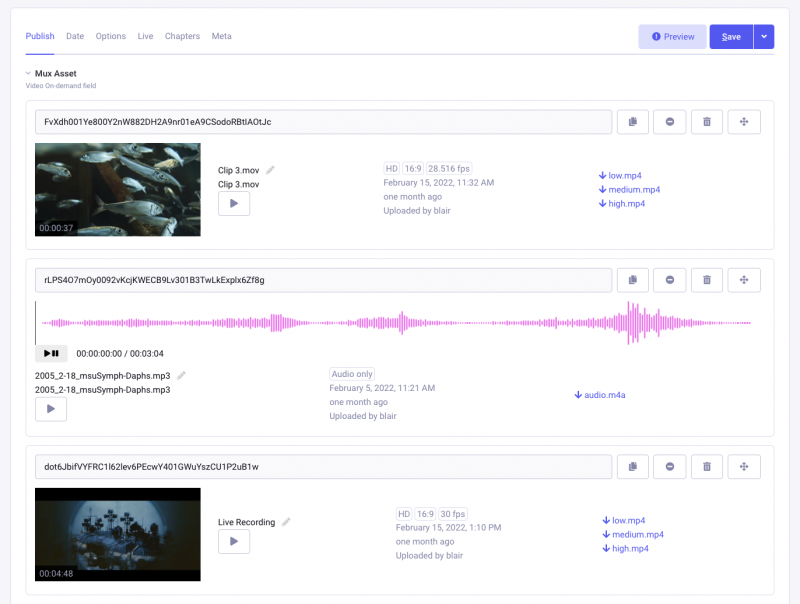
Video On-Demand (VOD) files are for playing back uploaded videos or live stream recordings. Mux calls these Assets. These are most like regular YouTube videos.
There are three ways of creating an Asset:
- Live stream recording.
- Video file upload.
- Clips created from other Assets.
Important Notes:
- There is no limit to the file size, number of uploads or time spent uploading.
- Audio-only uploads are supported.
- Each new asset is billed ($) per minute of time, unless in test mode.
Uploads
Uploads are sent directly to the cloud physically close to your location making transfers fast and avoiding congestion to your web server. Video files are usually available very quickly, usually seconds, after upload with Mux's Just-In-Time delivery. Some types of files, the more unique or professional codecs, may need additional encoding time. See Mux's Documentation on how to reduce those times.
IDs & Playback
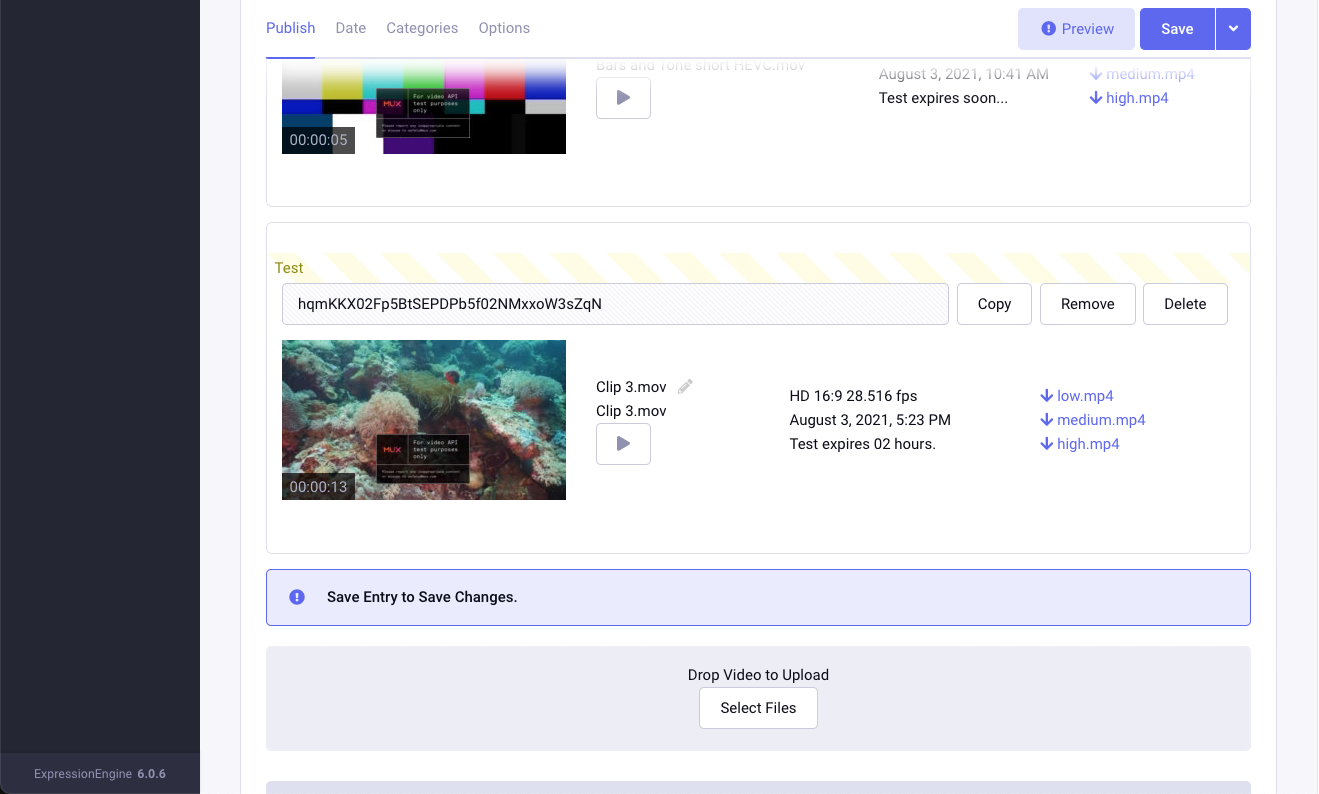
Each Asset (and live stream) has a unique Mux ID to identify the video. We call this the “uid” in the add-on. Each asset will have a playback ID to play the video, or get images. This ID can be rotated manually in the add-on, and changes when switching between public and signed playback requirements (coming up next).
Secured/Signed Playback
MuxEE supports signed playback. This is great for subscriptions or protected video content from being distributed outside your website. Each link has an expiration time, default is 24 hours, and can be locked to a domain. This also includes all image links.
This option is currently a global setting for all video, both assets and live streams, and can be changed at any time.
Mux's Guide on Assets: https://docs.mux.com/guides/video/stream-video-files
Test Mode
When getting started, you will need test uploads. So Mux provides a ‘test’ parameter when creating Assets. This includes all Assets (uploads, clips, live stream recordings) as well as Live Streams. Tests are FREE and incur no per-minute charge.
When first installing the add-on, all media is set as tests in the MuxEE Settings. Tests are a global setting for assets, and a separate global setting for live streams.
About Test Assets:
- Watermarked
- Clipped to 10 seconds, if pre-recorded
- Limited to 5 minutes, if live streamed [then disabled]
- Automatically deleted after 24 hours [sometimes]
- Test assets can not be switched to normal assets at a later time.
The blog post on Tests https://mux.com/blog/new-test-mux-video-features-for-free/
Creating Your First Upload - The Super Fast Way
The shortest possible way to upload a video.
1. Upload VideoHead to the Addon Settings - MuxEE - Upload page. Drag and drop a short test clip (15sec or so). |
 |
2. Open Video InspectorClick the play button to open the player inspector. |
 |
3. Copy the Playback LinkAt the bottom, copy the playback HLS link. |
 |
4. Paste into PlayerHLS requires a compatible player. Open Safari and paste the link. Alternatives are Quicktime and VLC's "network play" option. |
 |
Creating Your First Upload - In Entries
Normally you would want to upload videos directly in an entry. The Assets Fieldtype is designed to help with this.
1. Add Field Type to ChannelAdd the Mux Assets field to a channel just like any custom field. |
 |
2. Upload a VideoOpen an entry and you should see the drag and drop area for video uploads. File a video file, something 15 seconds or so to test, and add it. |
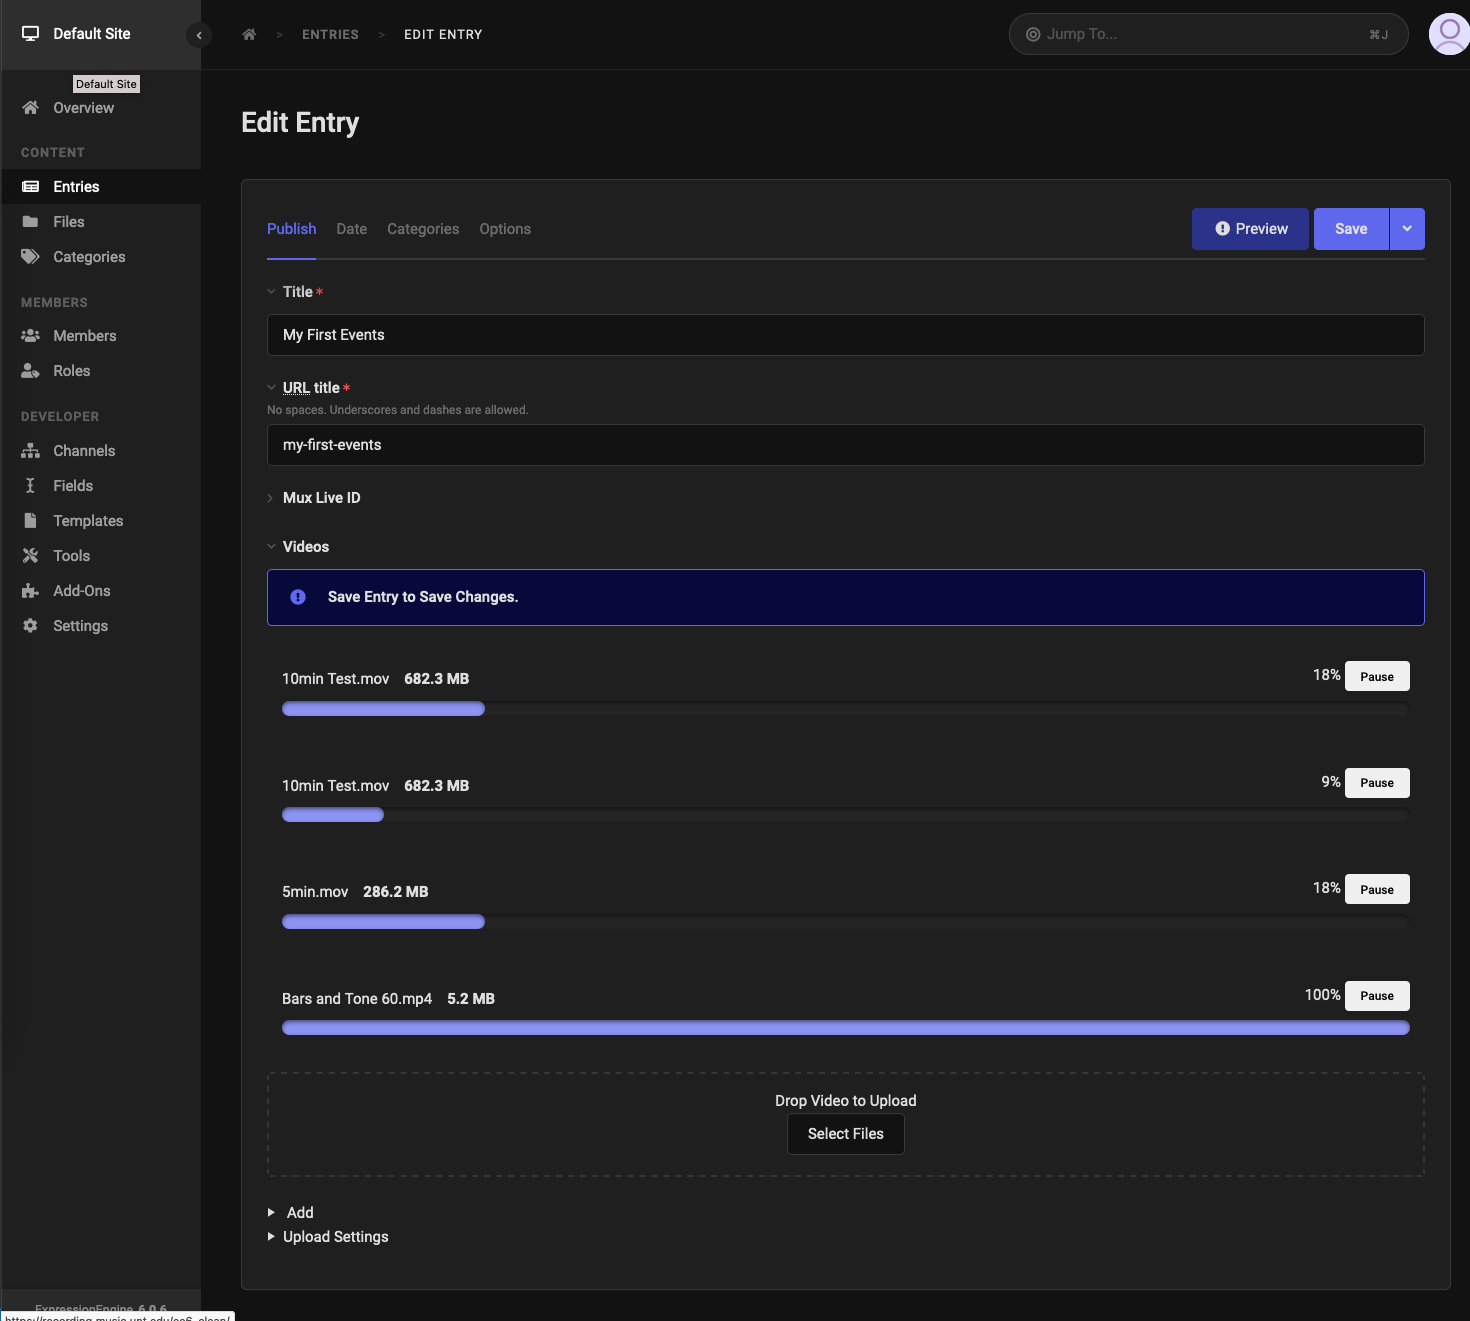 |
3. Save EntryMake sure to save the entry. This saves the IDs to the entry. If an entry is not saved, don't panic! Videos remain in Mux, and accessible in the MuxEE - Recent Assets area. Simply copy their IDs into the entry using the manual add button. |
 |
Clips and Live Stream Recordings are covered in their own guides.
To show videos in templates, head to the template guide.
Recomendations
- Content editors should try to upload videos to entries, and avoid uploading through the add-on's administrative page as much as possible. Copying IDs from the gallery to entries is intended to be for occasional content adjustments, not as a primary workflow.
- Use additional EE fields to add video metadata. Videos themselves have a title, upload date and user, but will not have additional fields to enter more information. It may be a better for your content to create a channel specifically for video and its related metadata that includes a Mux Asset field, and then use Relationships to link the video to another entry, like a blog.